How to Add a Custom HTML Section in Shopify: A Step-by-Step Approach
Introduction
When it comes to enhancing the functionality and aesthetics of your Shopify store, adding custom HTML to Shopify can be a game-changer. In this blog post, we’ll explore the advantages of using a Shopify custom HTML section and provide a straightforward, 4-step process to add HTML in Shopify.
Advantages of Custom HTML Sections
Design Custom Elements
Creating a unique custom section with HTML allows you to incorporate design elements that reflect your brand’s aesthetics. Whether it’s eye-catching banners, bespoke layouts, or tailored buttons, custom HTML ensures that every element aligns perfectly with your visual identity.
Interactive Website Features
Enhance the online shopping experience by adding interactive features like animations, sliders, and custom forms. Custom HTML sections not only improve user engagement but also create a dynamic shopping environment that keeps customers coming back.
Embedding Third-Party Content
One of the significant benefits of Shopify HTML integration is its ability to embed external content. Whether you want to add maps, videos, or social media feeds, HTML sections provide the flexibility to integrate these elements seamlessly within your Shopify store.
Advanced Styling
With the combined power of HTML and CSS, you can achieve precise styling for specific sections of your store. This capability ensures that every part of your site maintains consistency with your brand guidelines.
Unique Functionality
Custom HTML in Shopify themes allows you to implement features that standard Shopify sections might not offer, catering to your specific needs and enhancing your store’s functionality.
Innovative Features
HTML sections are ideal for testing new features or design concepts. You can experiment with innovative ideas without needing to alter your entire store’s layout, allowing for a more agile approach to design.
How to Add a Custom HTML Section
Ready to get started? Here’s how you can add a Shopify HTML code section to your store:
Step 1: Navigate to Theme Editing
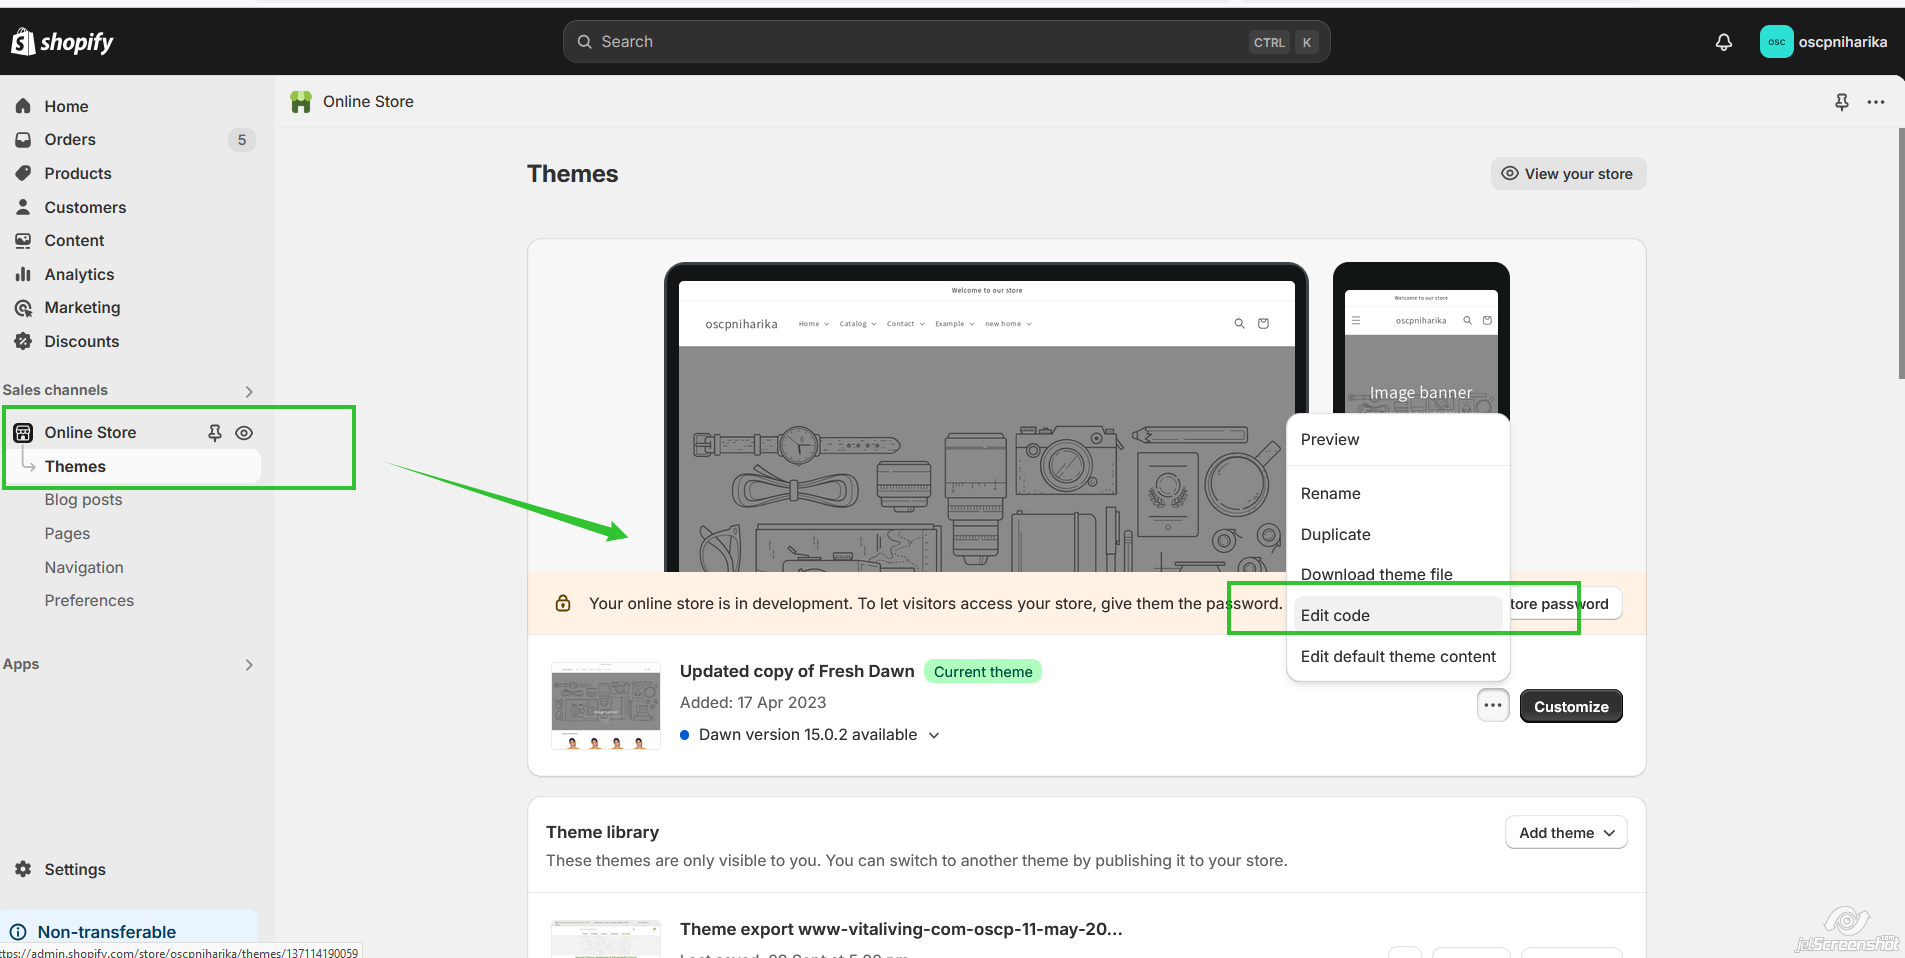
Go to your Shopify admin panel and select Online Store → Themes. Click on Edit Theme for the theme you wish to customize.
Step 2: Add a New Section
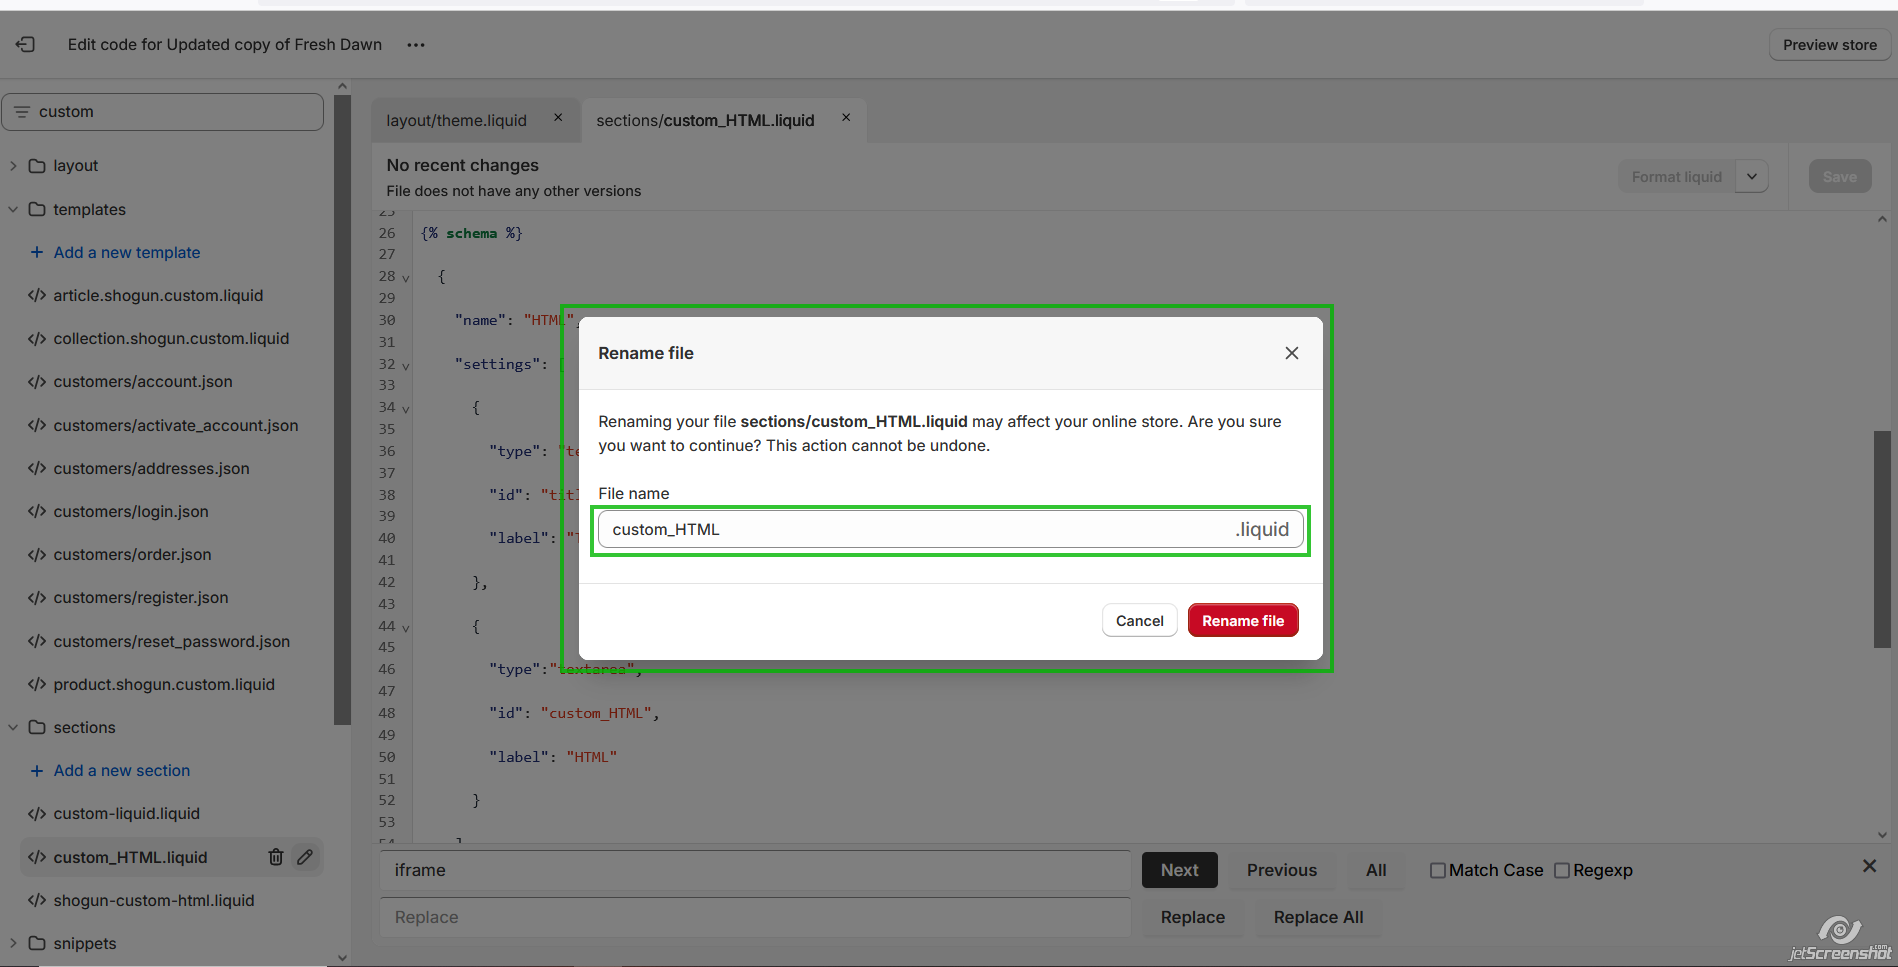
Once in the theme editor, click on ‘Add a new section’. Create a new file and name it ‘custom_HTML’.
Ready to launch your Shopify store? We will create a standout site with our development and optimization to build a store that sells.
Contact us now and get your store up and running fast!
Step 2: Add a New Section
Once in the theme editor, click on ‘Add a new section’. Create a new file and name it ‘custom_HTML’.
Step 3: Insert Custom Code
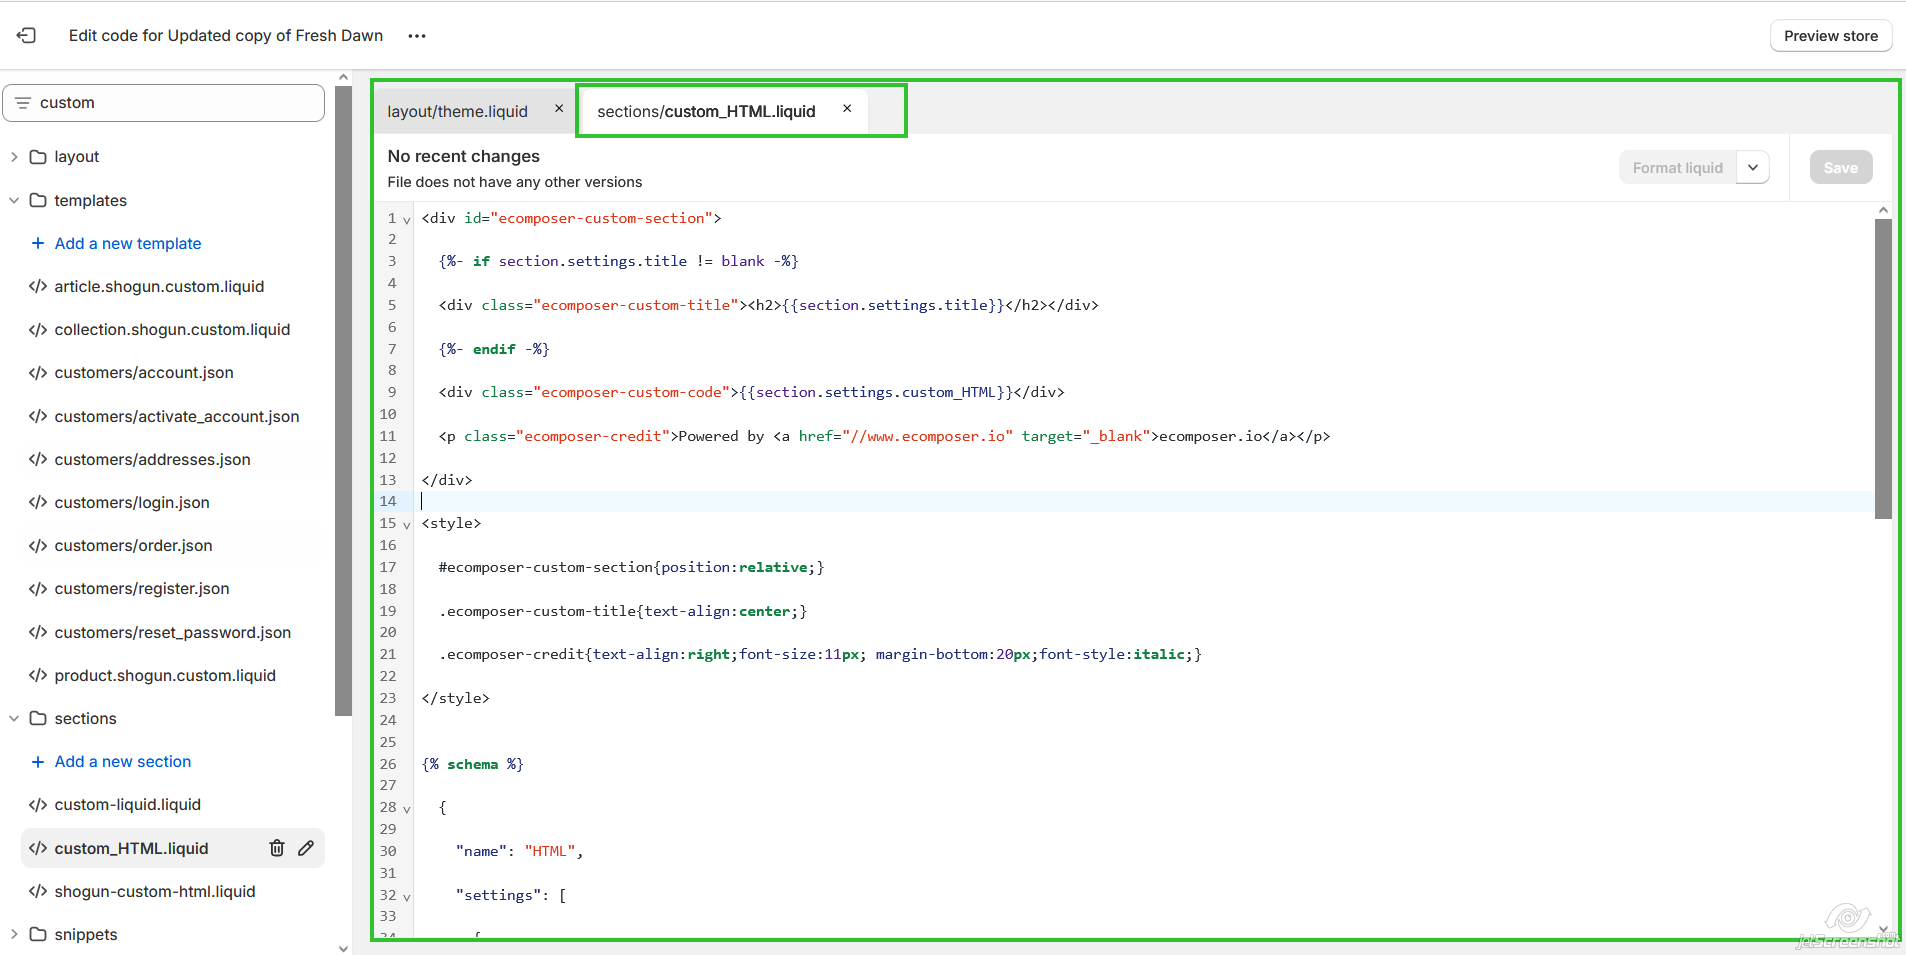
Open the ‘custom_HTML’ file you just created and add your custom code in Shopify. This is where you can integrate your desired HTML content.
Step 4: Customize Your Theme
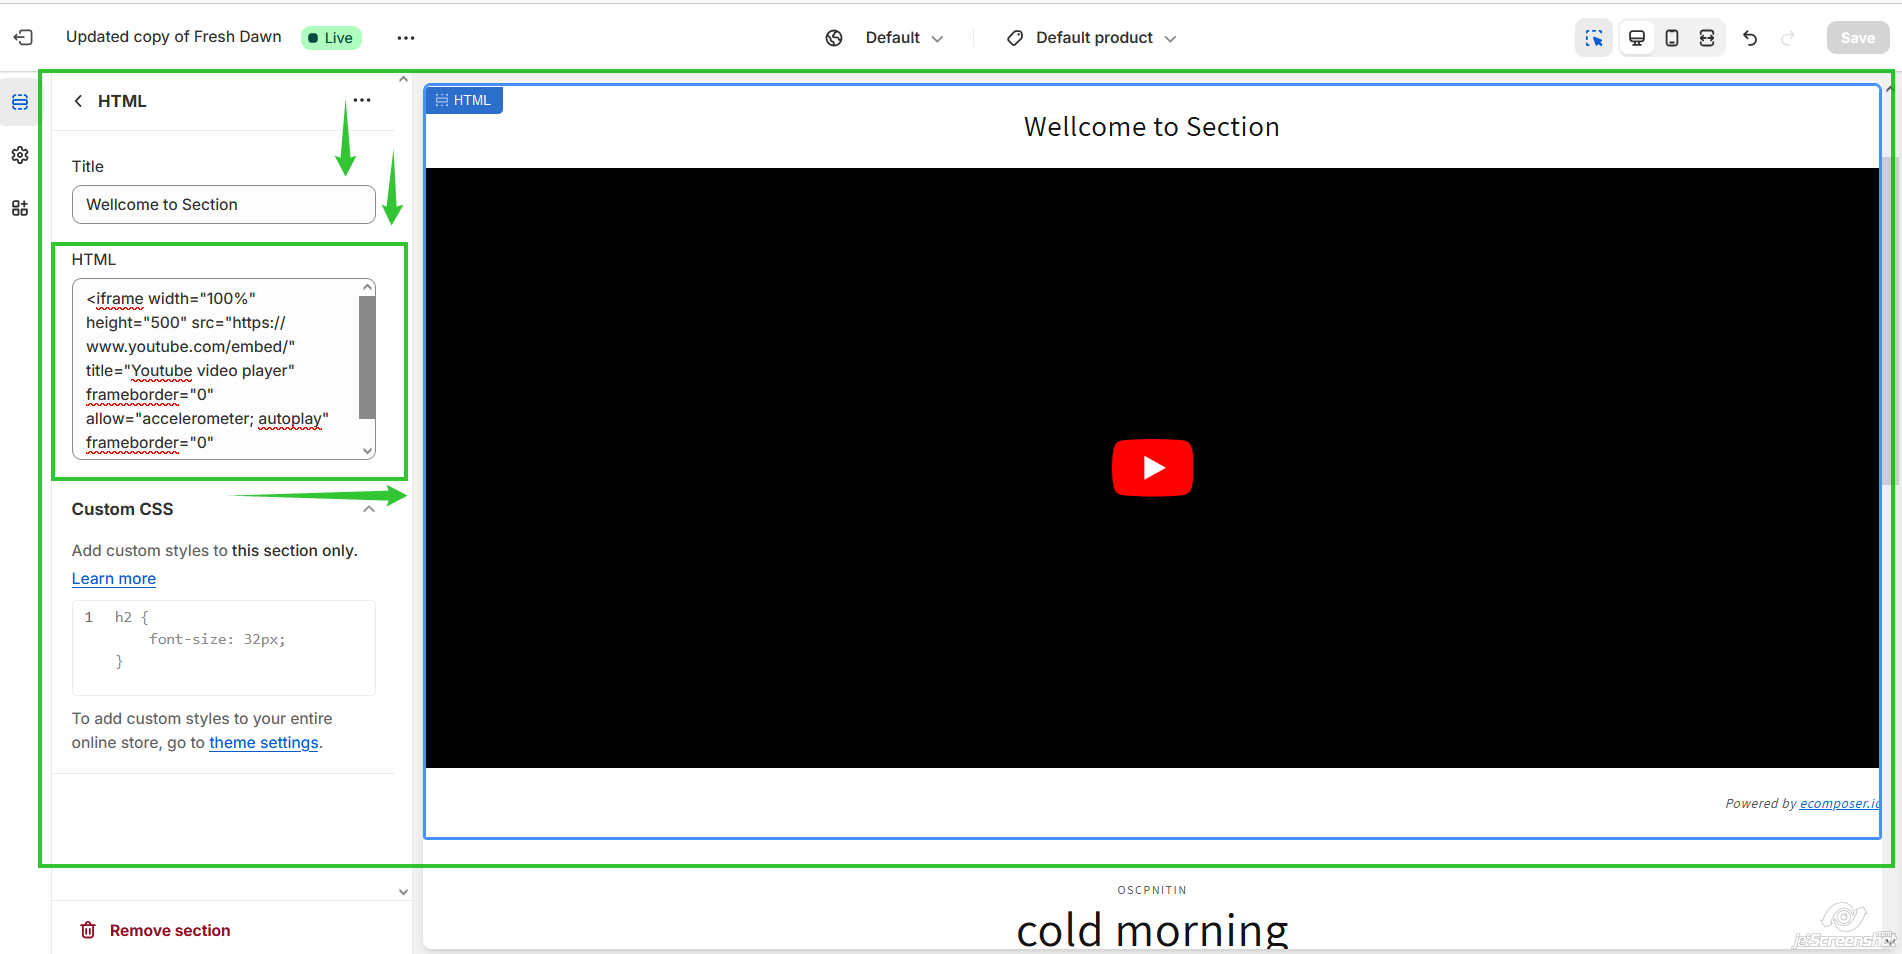
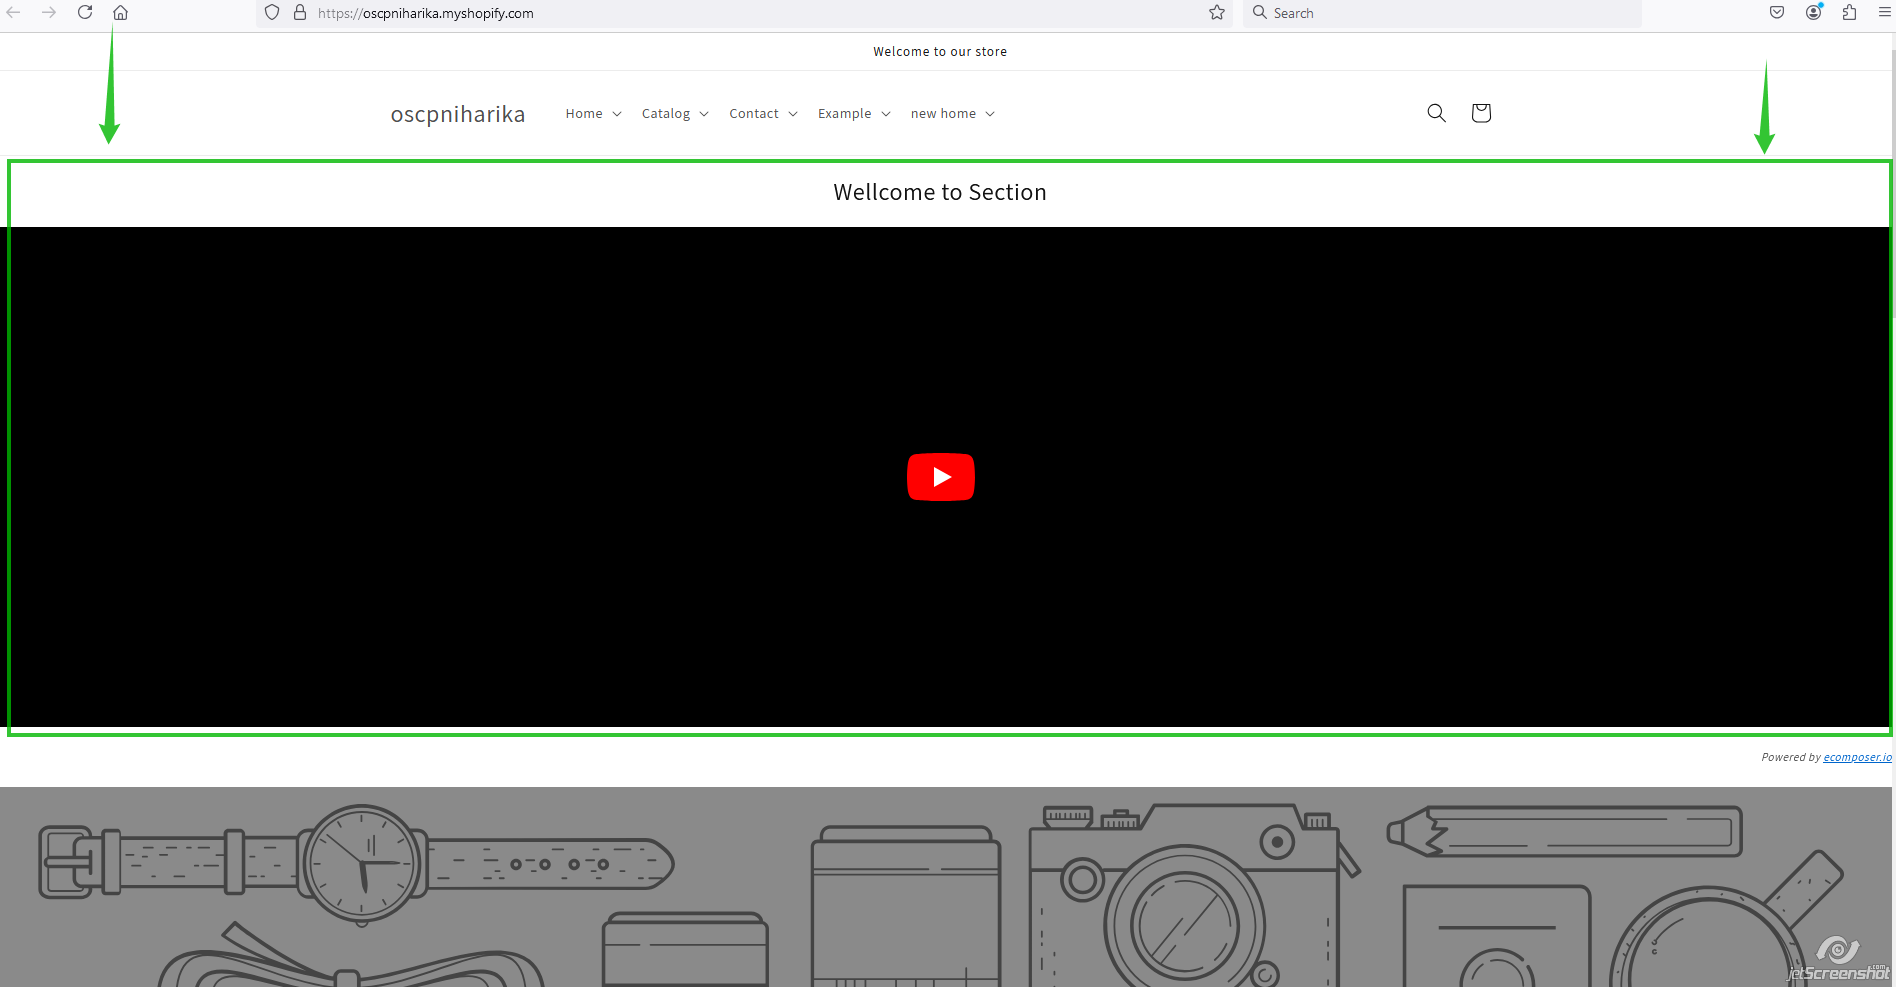
Next, navigate to the theme customization area. Find the section where you want to add your custom HTML and insert the desired iframe or code. For example, you can add a YouTube video link or any other code you wish to display.
Output
Conclusion
Adding custom HTML sections to your Shopify store can significantly enhance its design and functionality. By following these simple steps, you can create a unique and engaging shopping experience for your customers. Whether you’re looking to modify your Shopify store with HTML or embed third-party content, Shopify theme customization with custom HTML provides the flexibility and creativity you need to stand out in the competitive eCommerce landscape.
