 Skip to content
How to Set Up a BigCommerce Theme
Setting up a Bigcommerce theme involves logging in, accessing the default theme, customizing components, setting up the Stencil CLI, connecting folders, creating a local host, obtaining an Auth0 token, and deploying changes to the store.
Setting Up the Theme
To set up a theme on BigCommerce, follow these steps:
1. Log in to your partner account on Bigcommerce.
2. BigCommerce provides a default theme named “Cornerstone.”
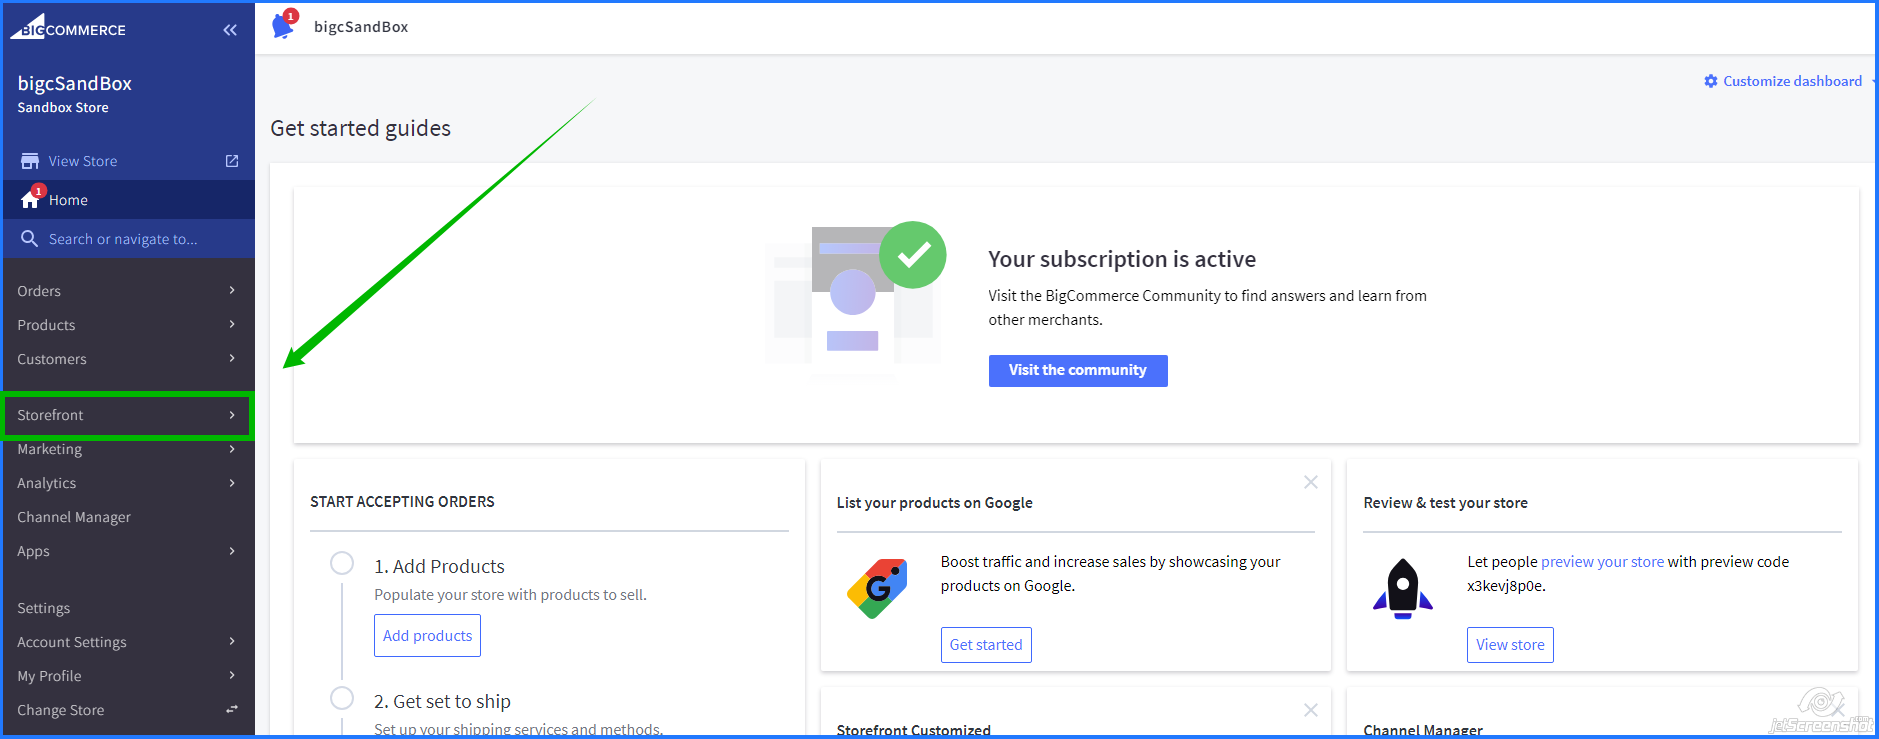
3. Navigate to the “Cornerstone” theme in the Storefront section.
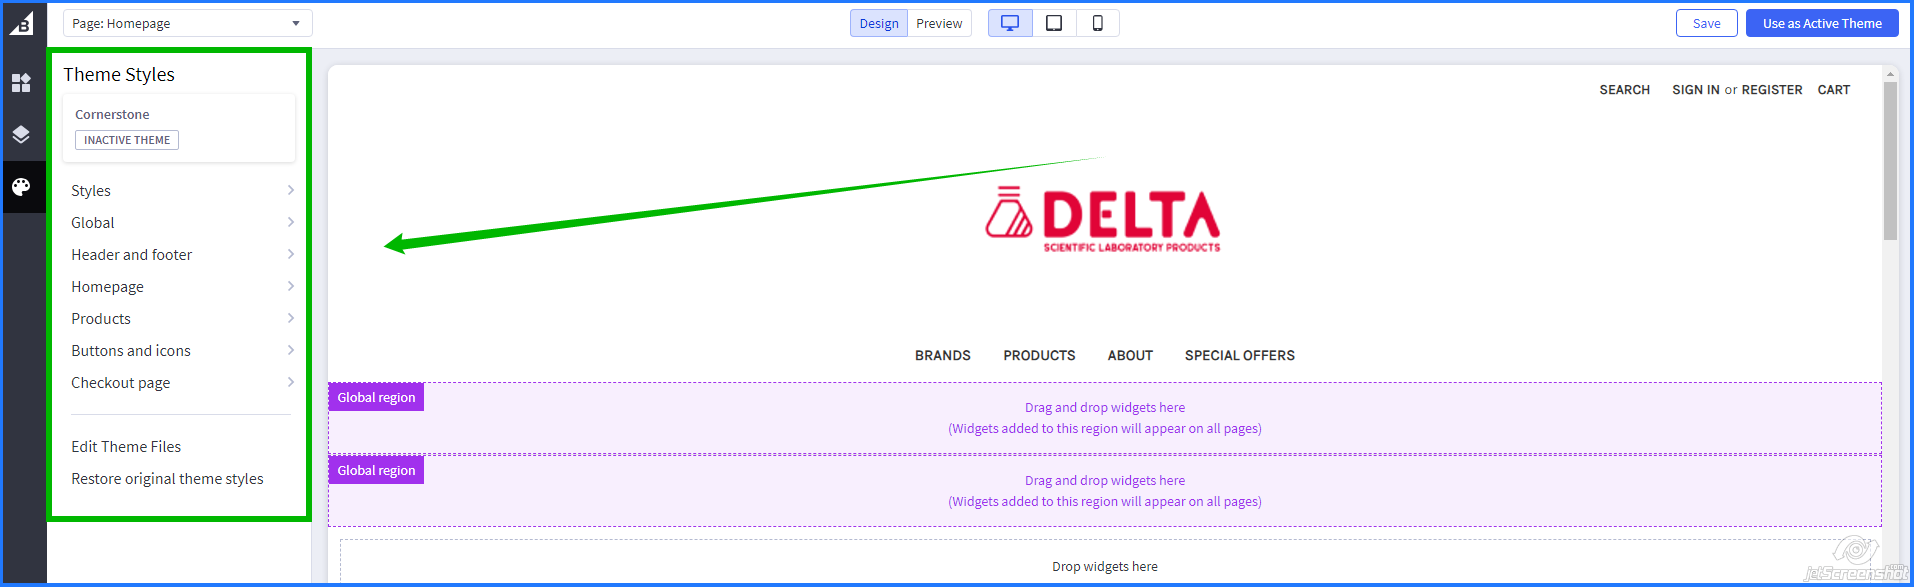
Customizing Themes

- You can customize sections, products, and other related elements.
- The customization section allows for adding theme sections and adjusting header, font color, background, and other aspects.
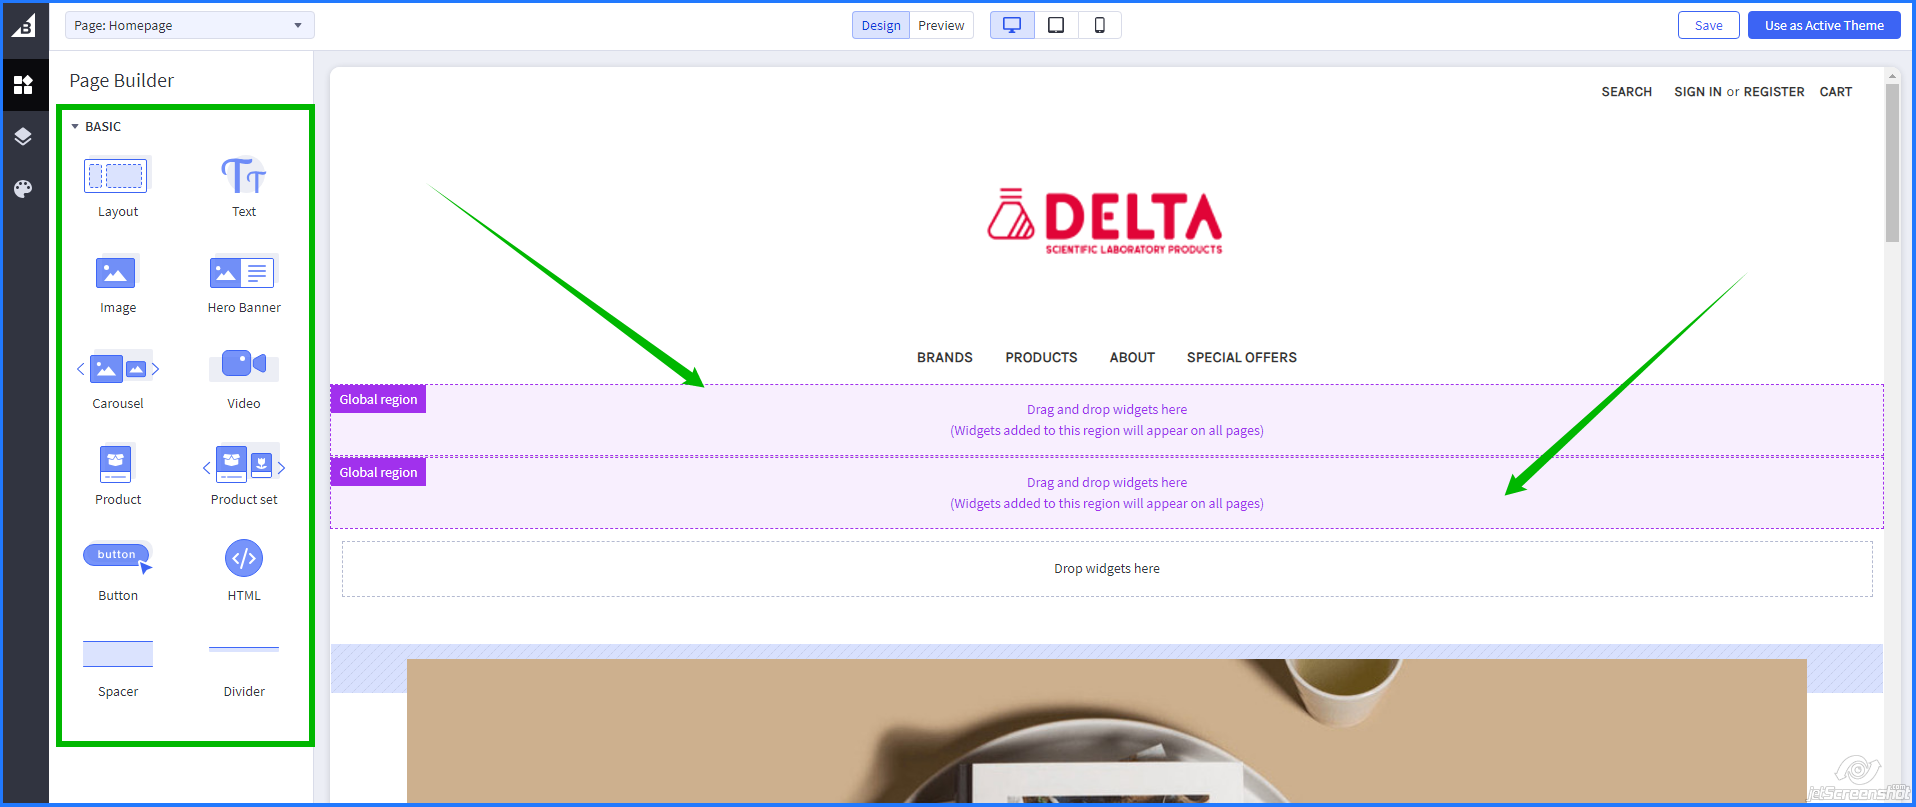
Note: Customization options are limited. To customize a section, download the theme folder, add files, and push changes using Stencil CLI.
Stencil CLI Setup
- Setup libraries required to run Stencil.
- Install Node.js (compatible version: v17.0.0 to v19.0.0).
- Run npm install -g @bigcommerce/stencil-cli to install Stencil CLI.
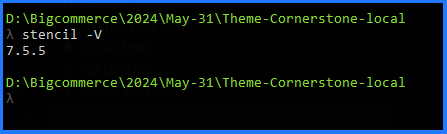
- Check Stencil version using stencil -V.
Connecting the Folder Structure
- Navigate to the extracted theme code path.
- Use command line or terminal to add custom files or sections.
After connecting your theme first, you need to connect your code with Stencil. After that, you need to create a localhost:
1. Install the npm modules by running “npm install”
This command will help you deploy your changes to your store.
2. Go to the dashboard > Settings > Store-Level API
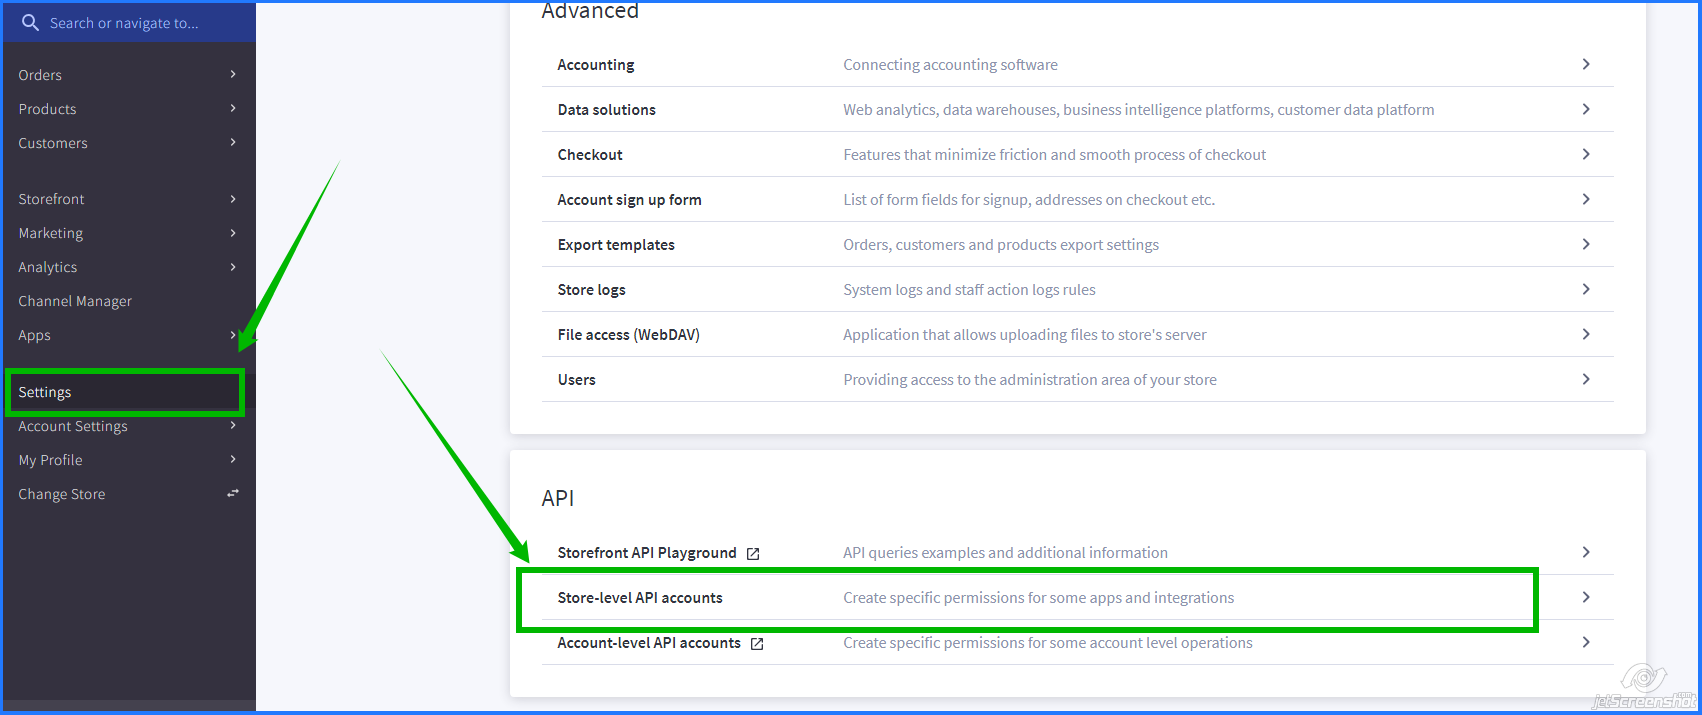
3. Create API Account”. This will help you connect the store for localhost
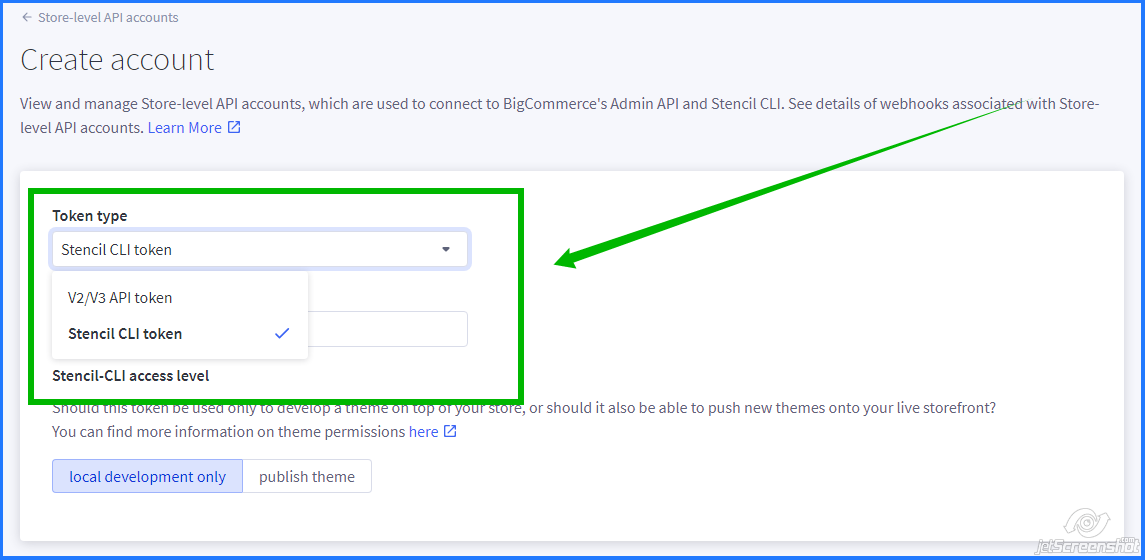
4. Select “Stencil CLI token
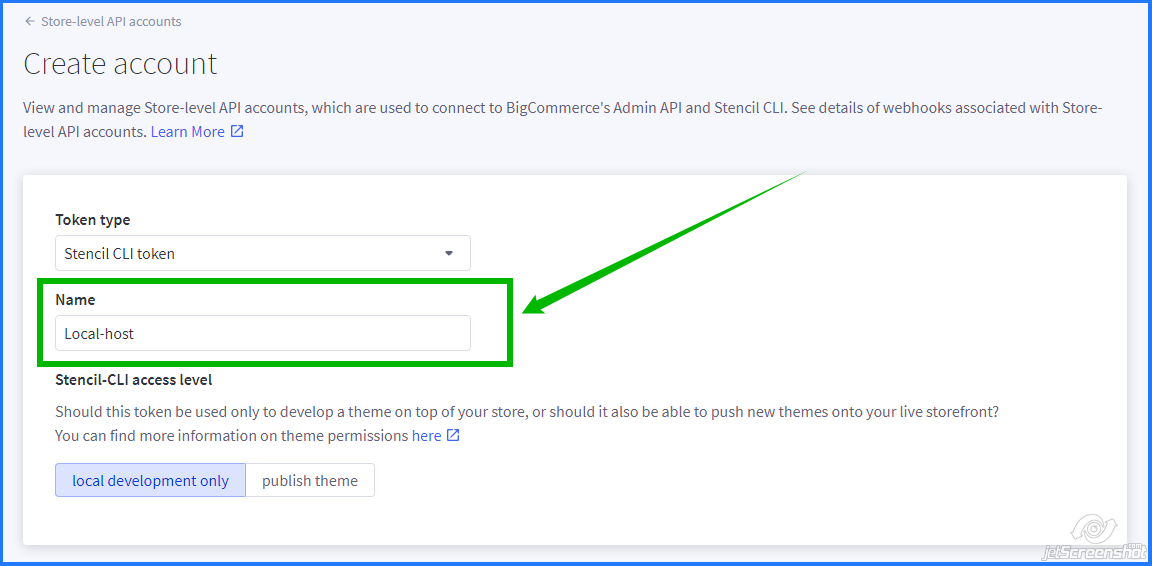
5. Assign your custom name (e.g., “Local-host”)
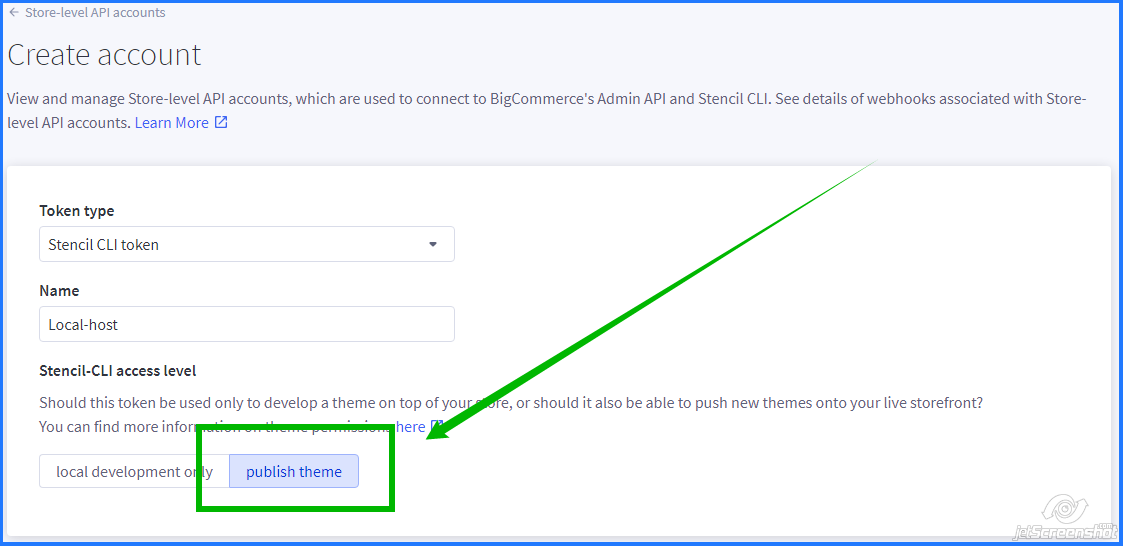
Note: Make sure you select “publish theme” because if you select “local development only,” then your changes will show only in localhost and deploy only in local mode, not pushing into the store.
6. After that, you will receive an access token, also called an Auth0 token, which is the key of Stencil for connecting local to the store.
7. To obtain the Auth0 token, go back to the Command line, and run the “stencil init” command:

After running this command, it will ask you to provide your homepage URL. Then, add the Access token which you have generated.

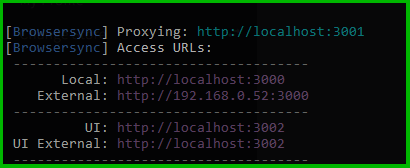
8. Select “npm”, install dependencies, and run “stencil start”. Access your localhost at localhost:3000.
To move changes to your live store or your store:
- Run the command “stencil bundle” to bundle your changes.
- After bundling, execute the command “stencil push -a” to push the changes.
Conclusion
Setting up a BigCommerce theme is essential to creating a professional online store. With careful customization and regular testing, you can effectively showcase your products, increase sales and ensure a seamless user experience, ultimately contributing to business growth.


