 Skip to content
Table of Contents
- Introduction
- Benefits of Using Git
- Complete Process of Using Git
- Git Installation
- Create a Git Account
- Create Git Repository
- Backup Theme Code
- Clone Your Repository
- Create a Working Branch
- Check Status
- Add Theme Files to Repository
- Commit Changes
- Pull from Main Branch
- Push Changes to Branch
- Create Pull Request
- Add Git Theme in Shopify Store
- Preview GitHub Theme
- Conclusion
How to Use Git in your Shopify Project
Introduction
Git is a tool for version control, project management and collaboration, so it is essential for every project. When we work on shopify projects and not using git then it is complex to track changes developer wise using git in your work you can improve the wayout of easily track changes, manage your code and versions and easily collaborate with your developers team. If you work on a big project or you are a part of a big team then you can understand the benefits of git in your shopify projects. It is clean and well organized for the complete development process.
In this blog post we will discuss the complete setup process of git for shopify project, add repositories and essential commands that we must to know for adding, commit and push changes to a child branch and after that resolve conflicts and merge changes in the main branch etc.
1. Why use Git in your Shopify Project?
Use of git your shopify project provides more benefits, it reduces the time of tracking code and provides an easy way of development. Some benefits of git are given below :
- Version Control : Git allows you to revert your changes on previous versions of the theme and also track changes in your file. So if any complex error in your code you can revert your changes.
- Collaboration : If you have a big project and need to work multiple developers on the same project then using git, it is easily possible without overwriting code issues.
- Backup : Git provides you the main facility of storing your code in a remote repository, so it is safe from any type of data loss.
- Branching : If multiple developers are working on different parts of code or different issues then you can create separate branches for each and after done and review merge into the main branch. It makes your main code base stable.
- Resolve Conflicts and merge : It may be possible when multiple developers are working on the same theme code then increase the chance of code conflict, git easily track the code conflicts and resolve and provide an easy code merge process in one click.
2. Complete Process of Using Git in Shopify Project
For use git in shopify you need to follow some steps it makes easy, standard and accurate development, so lets start :
Git Installation
First you need to install git in your system from the official git website and follow the instructions of installation for your operating system.
Create a Git Account
After installation of git, If you have a git account then no issue simply login but if you have no git account then need to create a git account with email and password.

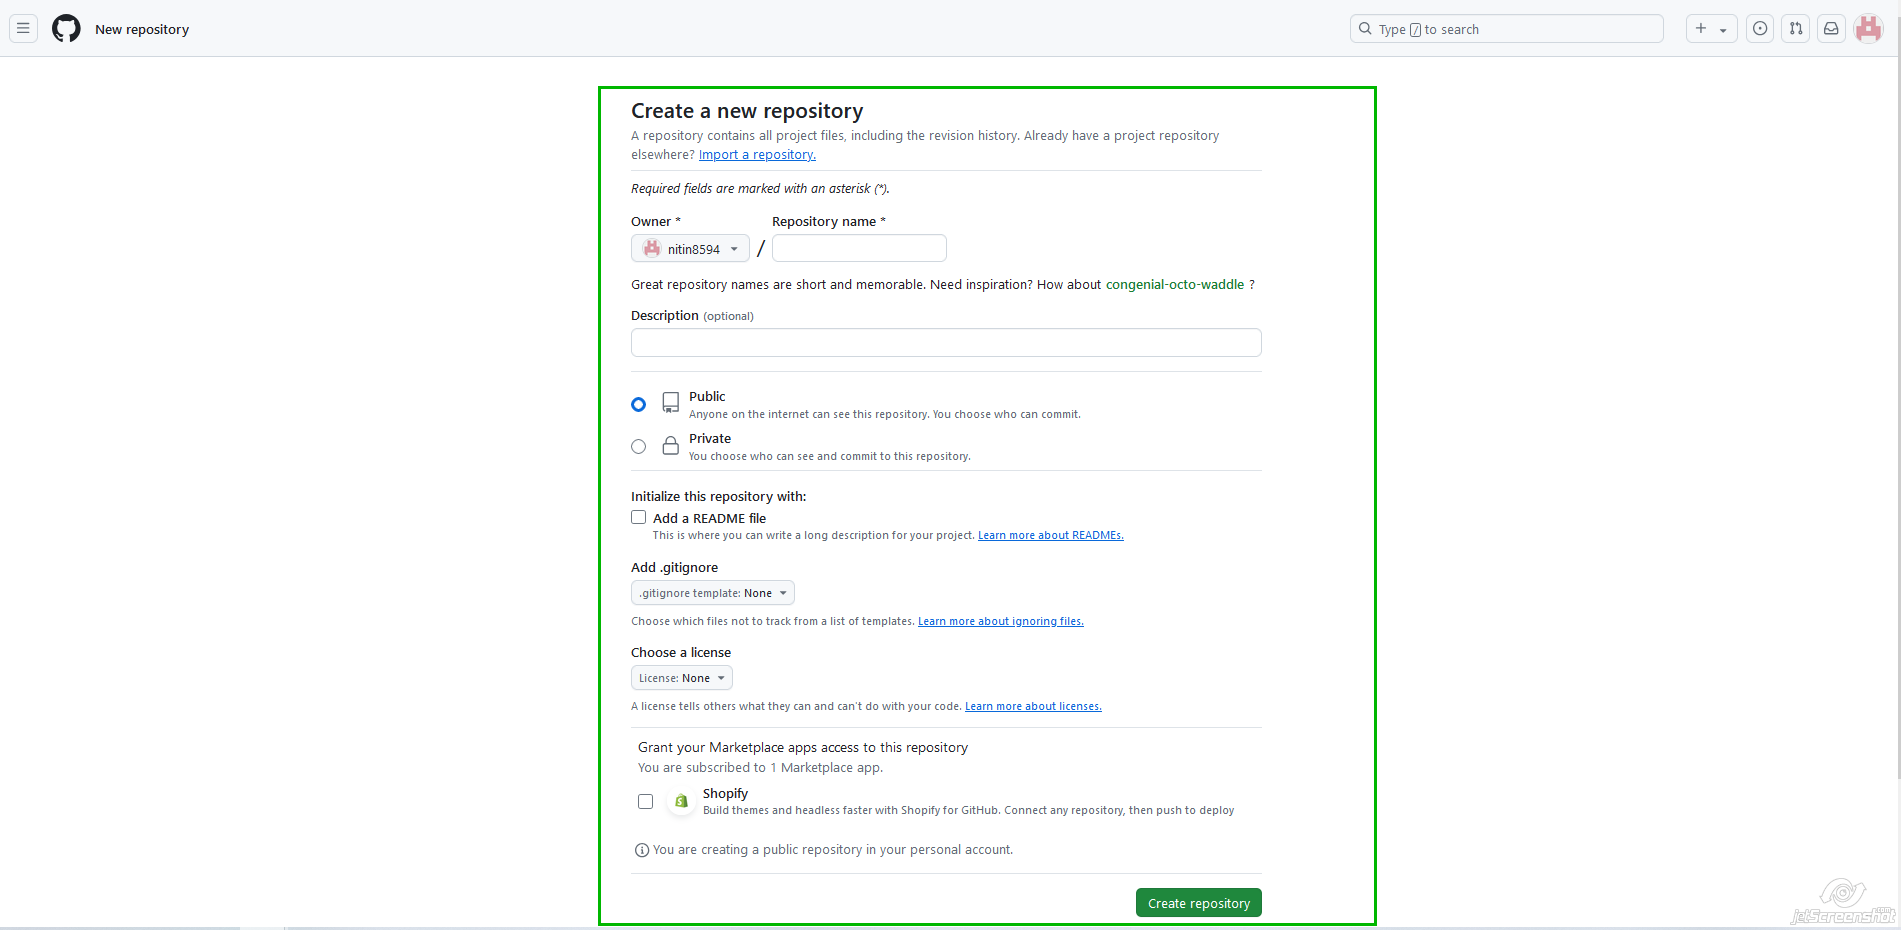
Create Git Repository
After creating a git account you need to create a repository for adding theme files. For this Click on New and fill required information.
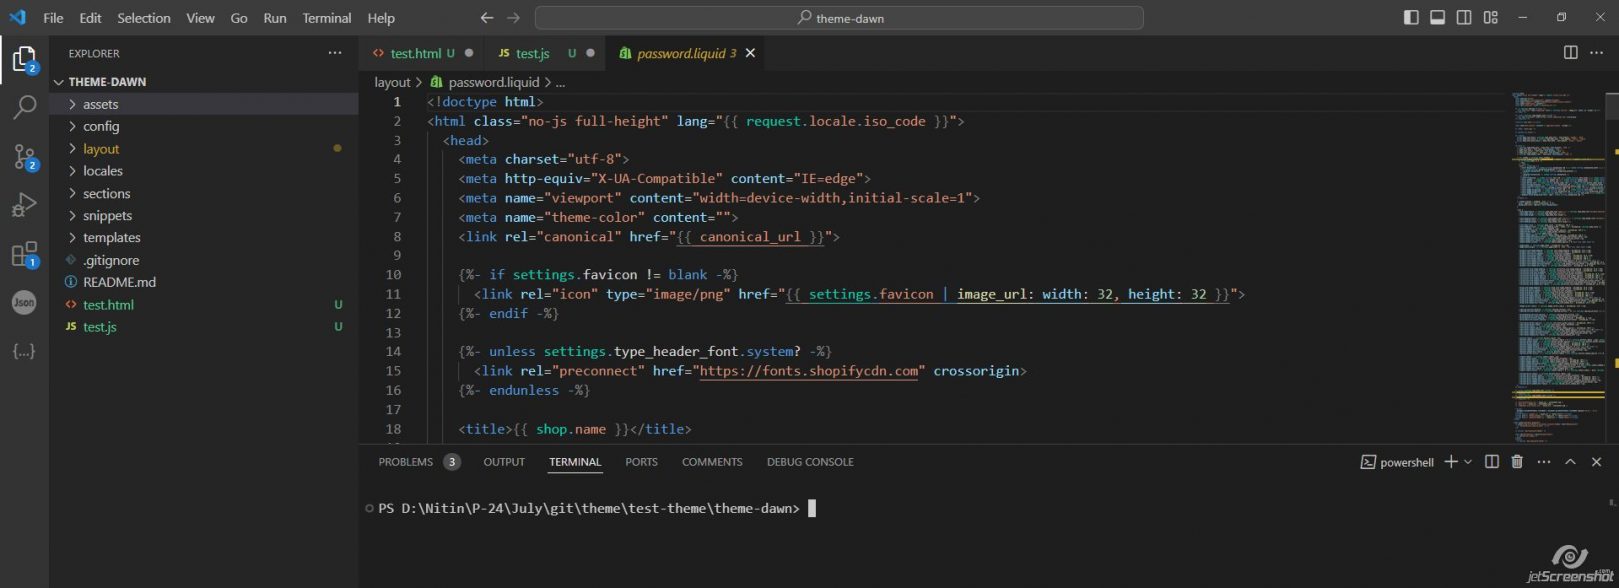
Backup Theme Code
Download your theme file and open folder in vs code and open terminal.
Clone Your Repository
Clone repository address from open github account -> select repository -> code -> ssh and copy address

Open your terminal of vs code and paste with command
git clone
Like this
git clone git@github.com:teamshopify-dev/theme-dawn.git
Create a Working Branch
If multiple developers are working on the same branch then it causes issues, so the best solution is create separate branches and work. For this you need to open vs code terminal and use below’s some commands
For check branchname
git branch
For create branch
git checkout -b your_new_branchname
For change branch
git checkout branchname(in that you want to switch)
Unlock Your Shopify Potential: Expert Development and Speed Optimization Await!
Check Status
For checking your changed file before adding you can see using this command.
git status
Add Theme Files to Repository
After cloning you need to add all theme files into your repository for this you need to add theme files into repository using add command in terminal.
git add .
Commit Changes
After adding all files you need to commit the changes using this command.
git commit -m “your message”
Pull from Main Branch
Before push the changes the best practice is get pull from main branch because if multiple people work on the same project then your changes may be overwritten , to resolve this problem you need to get pull of the latest code and then push your changes.
git pull origin main
Push Changes to Branch
After Commit your changes you need to push changes on your branch using this command.
git push origin
Create Pull Request
After push your changes you need to create pull request and merge changes with the main branch for this open github and click on compare & pull request.
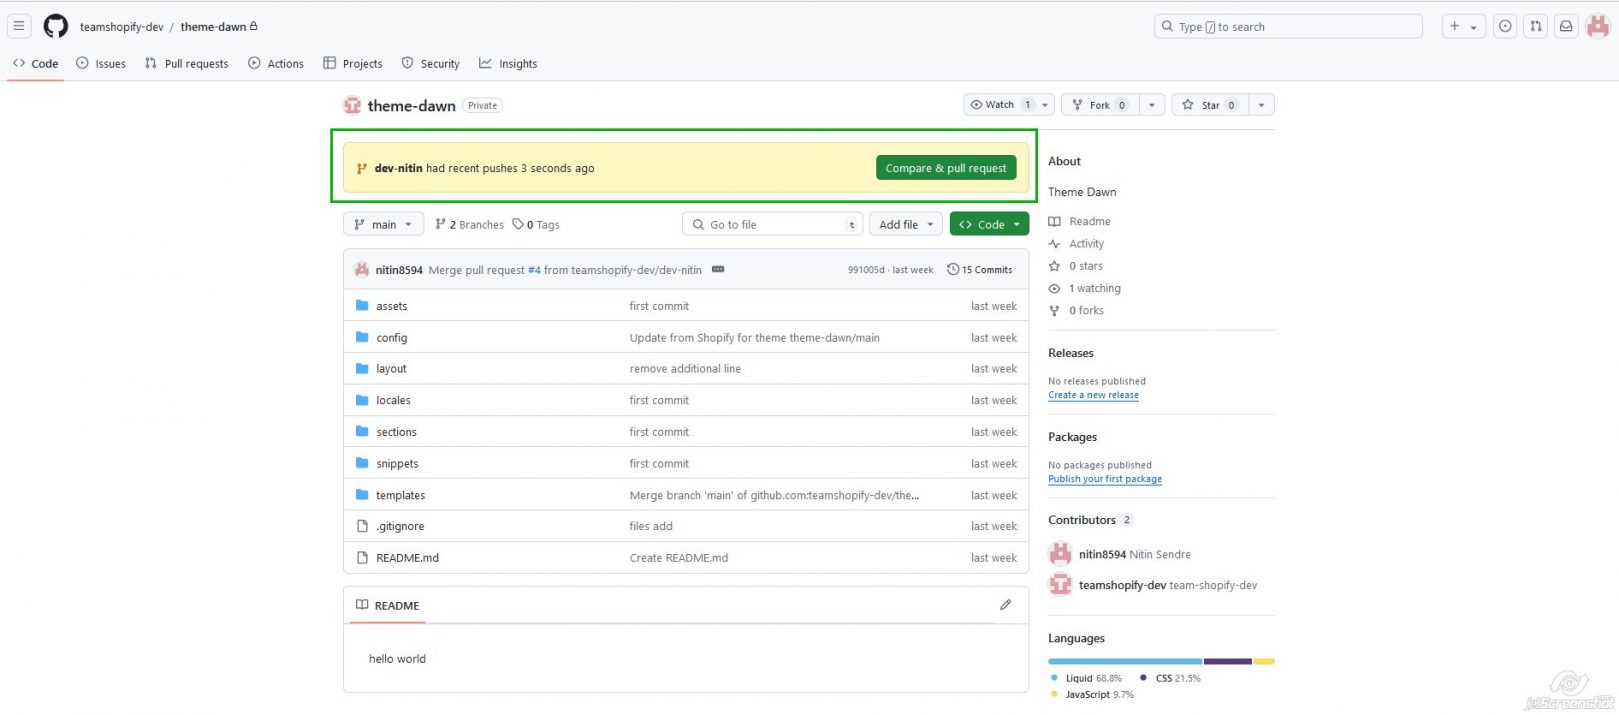
After that click on create pull request and then after code review, resolve code conflicts and merge pull requests.
To follow the above points of using git in shopify, after this you can perform changes and save in visual studio code editor and repeat step 7 to step 12.
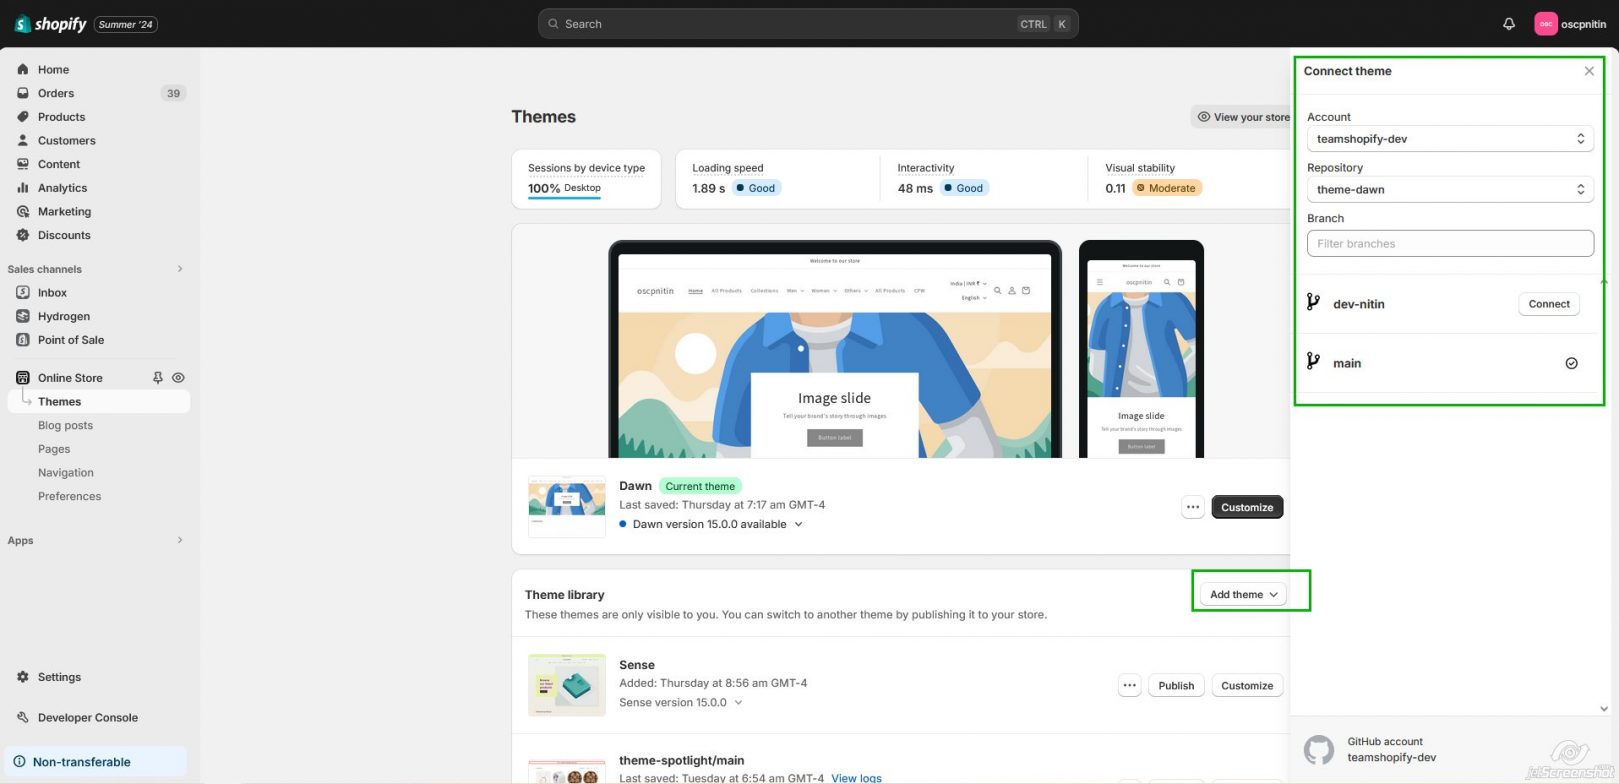
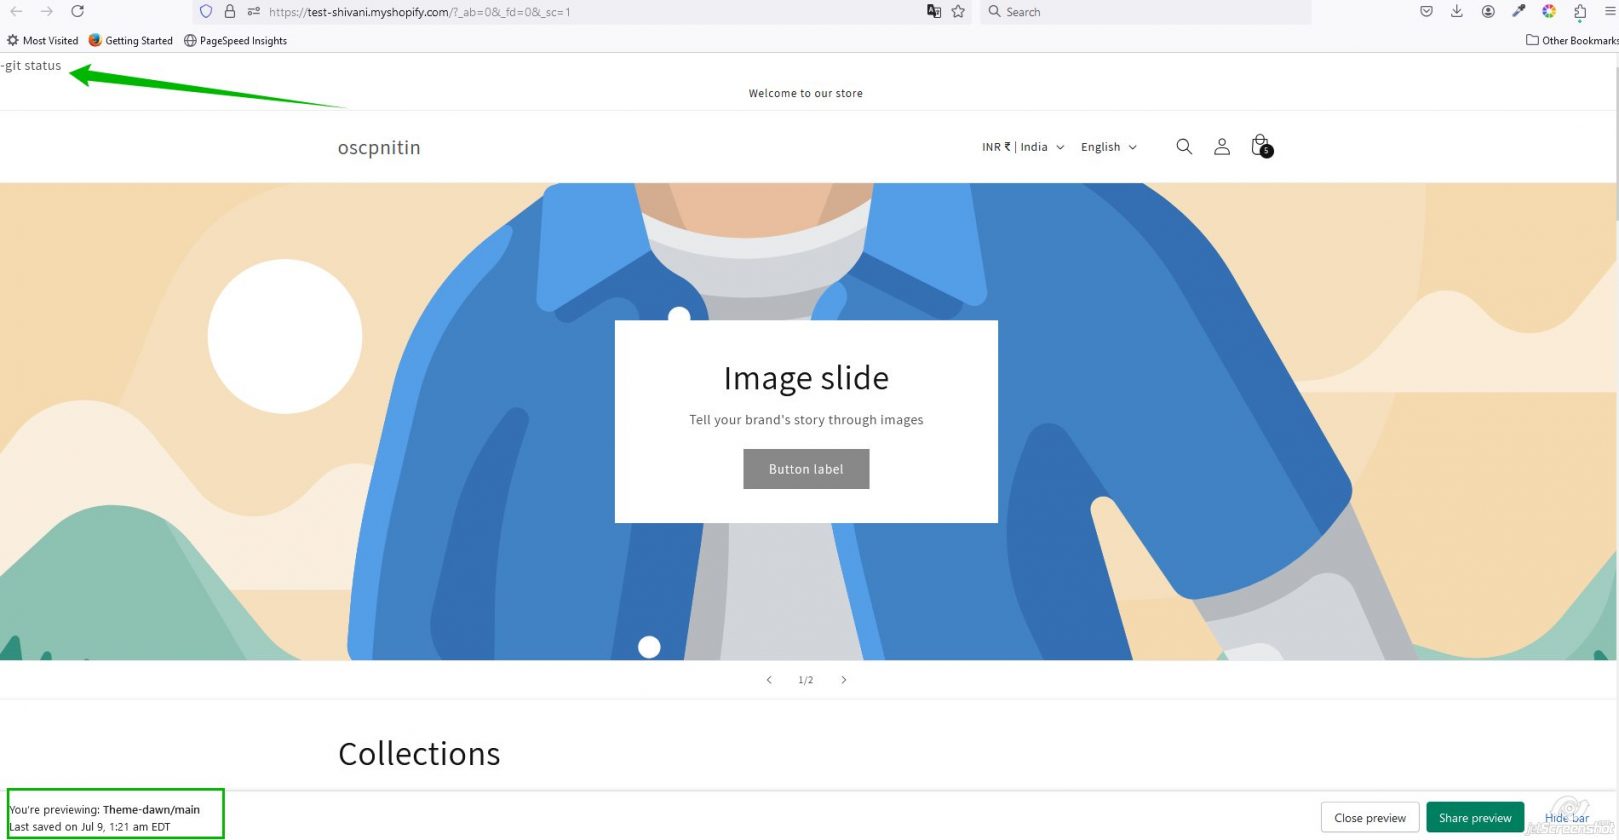
Preview GitHub Theme
To see your changes after merge you need to preview your theme from shopify admin and check.
Conclusion
Integration of git in your shopify projects helpful for managing code properly, maintaining versions history of code and collaborating with the team. By following the above points you can easily integrate git and use it in your shopify projects. So let’s start from today and get the benefits of multiple features.


