How to Create Customer Groups?
1. To create Customer Groups, follow these steps:
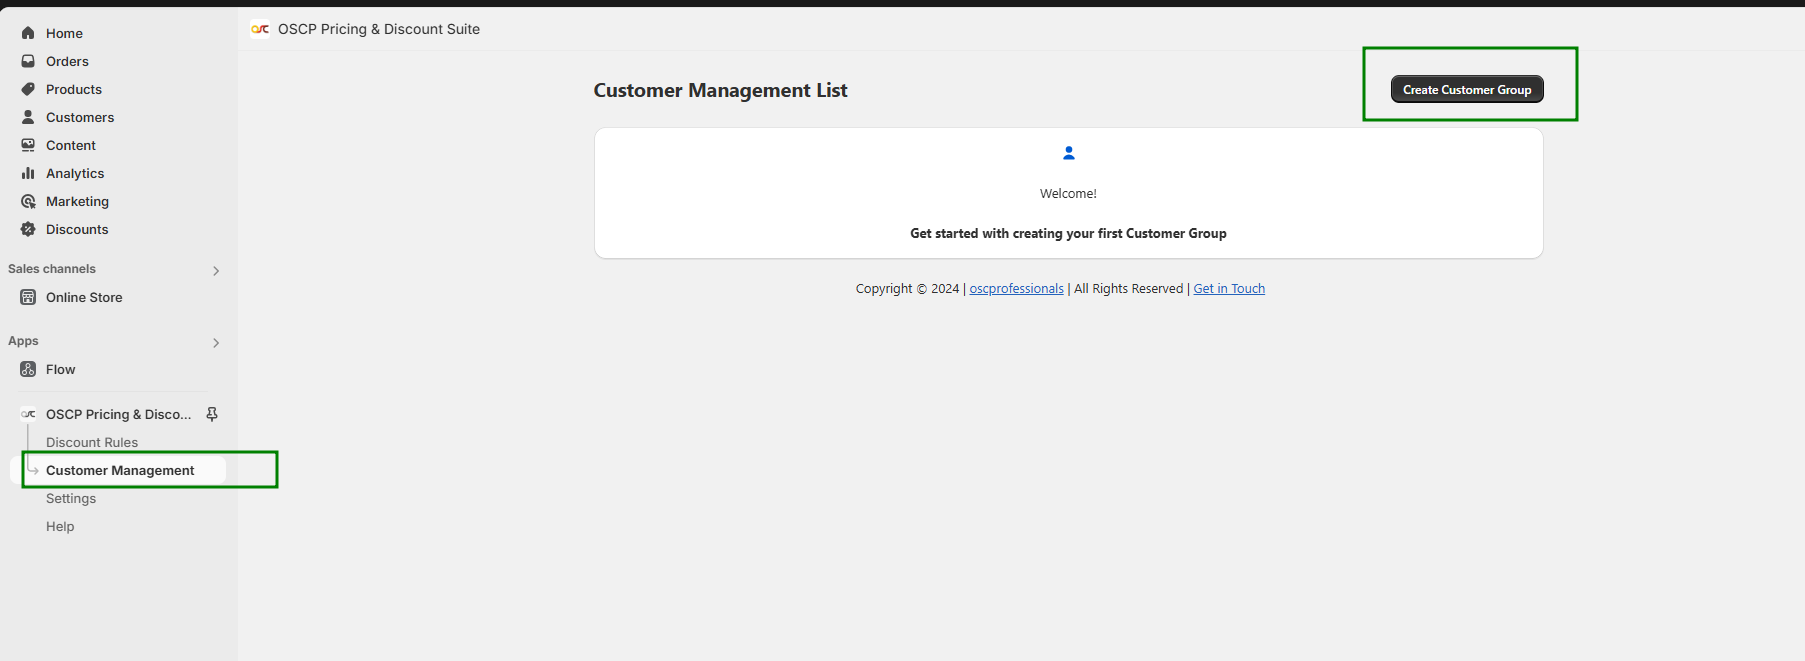
- Navigate to the Customer Management App navigation.
- Click on the Create Customer Group button.
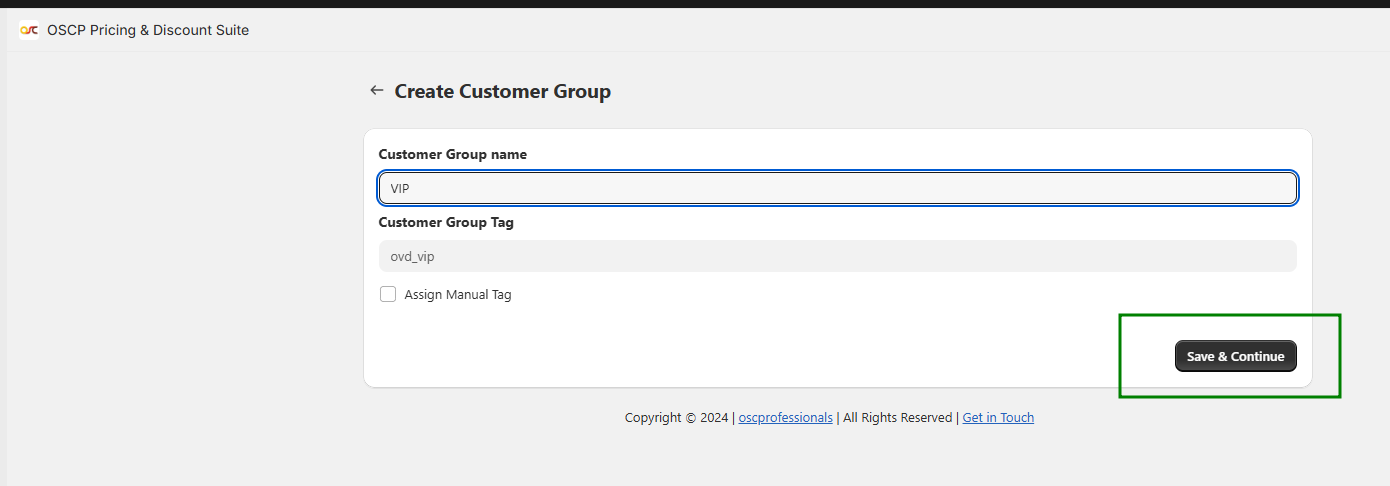
- Enter the Customer Group name to automatically generate a default customer tag. Alternatively, you can create a manual tag by checking the “Assign Manual Tag” option, which allows you to add a custom Customer Group Tag. Once you’re finished, click the “Save & Continue” button.
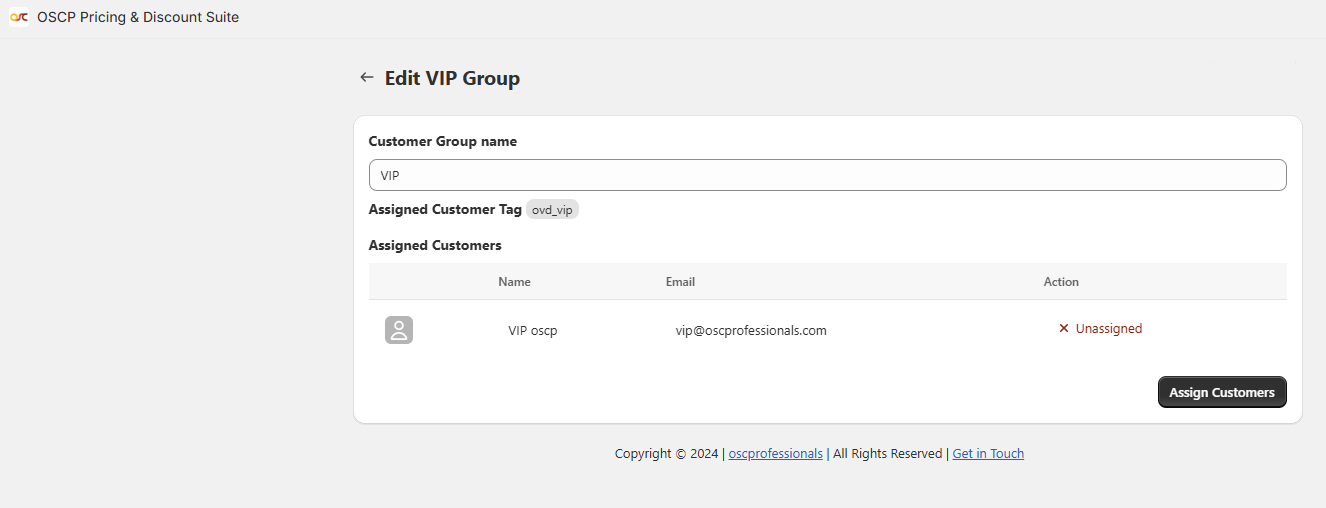
- Next, assign customers to the created group.
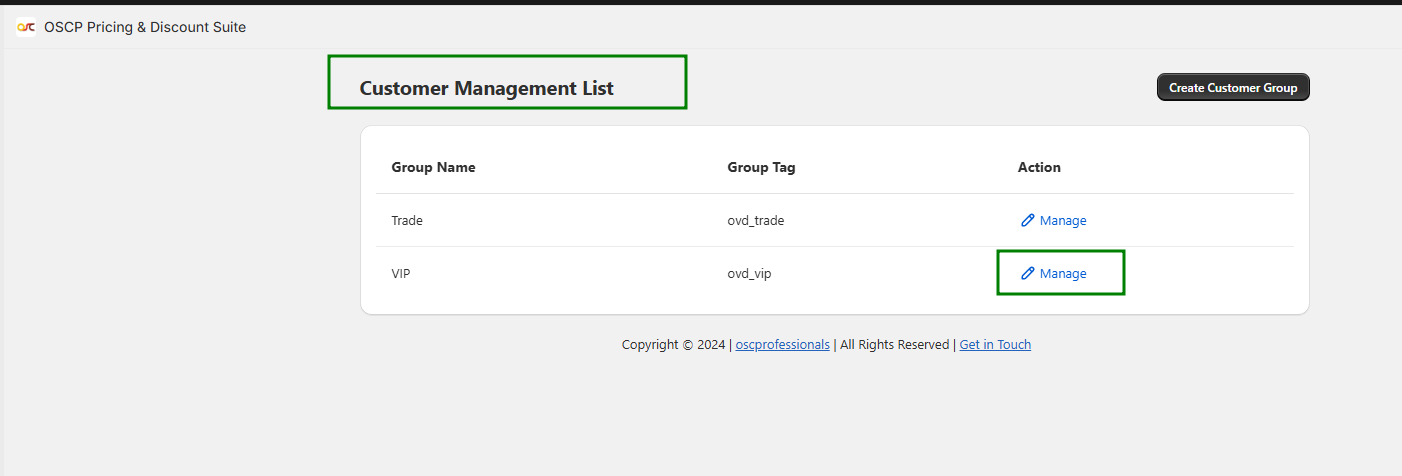
2. Then it will redirect to the manage list of Customer Group, where you can manage the customer groups.
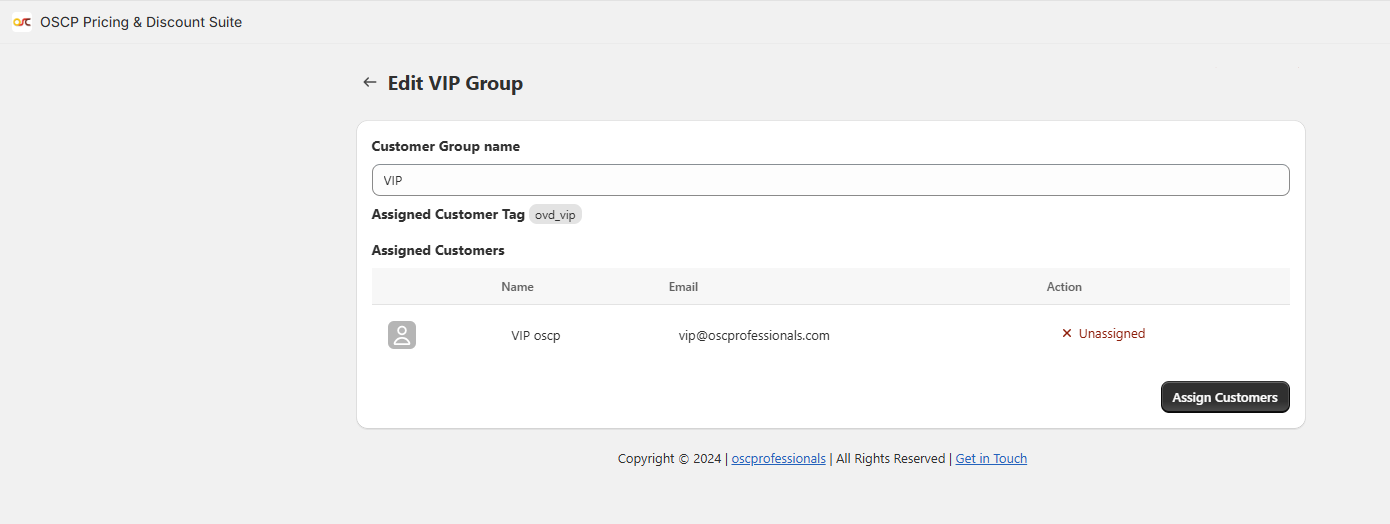
3. The Customer Group Editor form will appear, allowing you to edit customers assigned to that group.
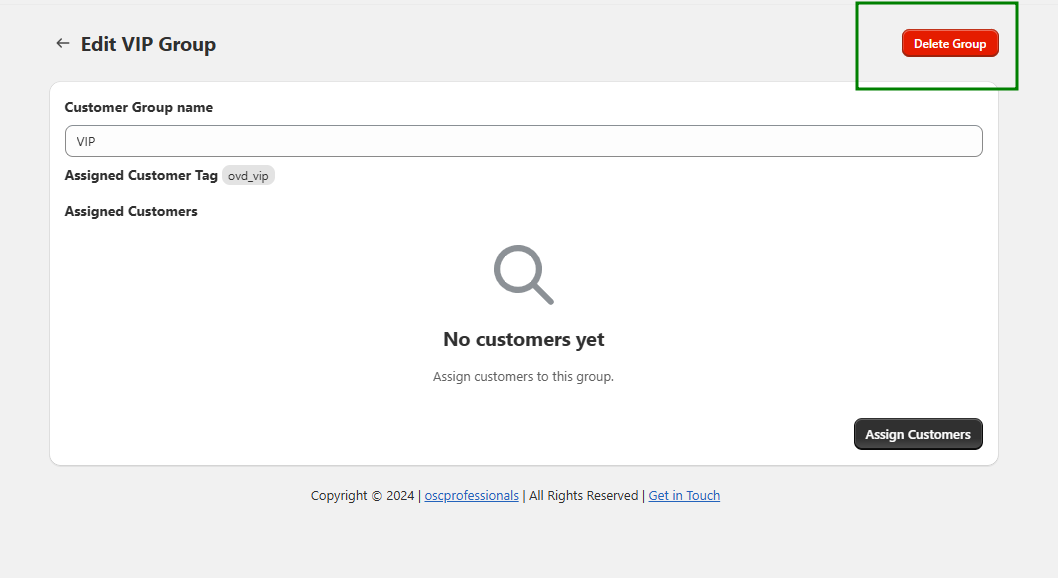
4. To delete a customer group, first unassign all customers from the group. Once that’s done, the “Delete Group” button will appear next to the “Edit Group” option. Click the “Delete Group” button to proceed.
